I recently came on as a Sparkbox Apprentice, and, though I have been writing code for over ten years, I never before considered myself a programmer. The path to becoming a developer is different for every person; everyone finds different aspects of code challenging or intimidating. For me, the largest roadblock to becoming a developer was the command line. I blame Keanu Reeves.
In the 1999 smash hit movie The Matrix, Keanu Reeves plays Neo, a computer nerd who ends up living in a software world created by robots. TL;DR: Neo turns out to be a fantastical “chosen one,” so powerful that he can control the code that makes up the Matrix with his mind. Neo is the ultimate hacker.
At the beginning of the first Matrix movie, Neo is alone, at home, in a dark room, forming secret, plot-centric conversations with fellow-hacker Trinity. The majority of this dialog takes place in bright green letters on a black screen. This forever cemented in my twelve-year-old mind that anyone who can type into the command line and not blow up their computer must have Neo-like superpowers.
I was wrong, of course. Using the command line is a skill, just like anything else; a simple skill, even! Popular media, like The Matrix, has reinforced the stereotype that command line is only for the elite. I had to overcome the fear that my computer would blow up if I typed the wrong thing into the terminal. Now it is your turn, my new Neo. How far down does this command line rabbit hole go?
Step One: Create a Backup
“I know just enough to break things,” is commonly said by those who first learn command line. This is somewhat silly, in my mind, because what can you really break? Sure, you hear horror stories about people deleting their root directories (which requires a complex sudo command and your password), but how often does that actually happen?
The easiest way to feel comfortable mucking around with command line is by knowing you can’t really mess it up. You likely won’t have a problem at all, but, just in case, and for peace of mind, backup your drive to an external disc. If you have a Mac, Time Machine is an excellent way to restore everything exactly how you have it, and it’s built in to the OS.
Step Two: Open the Terminal
I get it. Sure, even with a backup, the command line can be intimidating. Let’s get over that. Open up a Terminal window, or, if you are on a Windows machine, open Command Prompt or Powershell. Right now. Got it? Was that so difficult?
The Command interface is just a place to type text commands to your computer and have them executed to do fun stuff. It can be much quicker and more versatile than using a graphical interface (such as Finder on OSX or My Computer on Windows). This interface has a “shell,” or a program that takes your commands and tells the computer how to use them. Two well-known shells are bash and zsh. You can also learn more about shells and shell scrpiting in this post.
Step Three: Make a New Folder
Let’s make a new folder on your Desktop via command line.
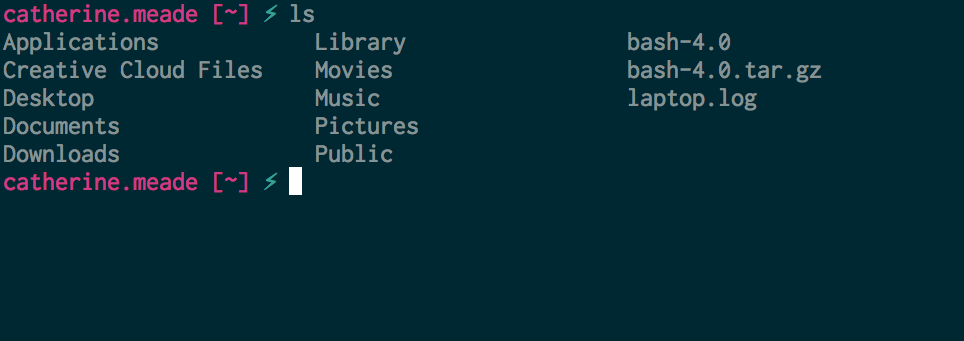
When you open a window, you should see some words and a cursor. This is called the Command Prompt, and can say something like ` C:\>_ ` or ` Your-Macbook-Pro/~ yourname $ `. Mine looks like something Avril Lavigne drew in her middle school journal (lightning bolt and all—see below). You can make the prompt look like anything you want. It can even include emojis!

When you start up the command line interface, you should be located in your “Home” directory, which is often represented by a tilde (~). This is where all your computer files are stored. Cool fact: the Home Directory earned the tilde symbol from a Lear-Siegler ADM-3A terminal, commonly used in the 70s, which had the “~” and “Home” functions assigned to the same key (at the time, a “home” button moved the cursor to the upper-left “home” location on the screen).
Let’s look at the files in our Home Directory. Type the list command, ` ls `, into your terminal window, then press the return key.

There you are! Now we can see all the directories located within the current directory. Hidden files are files and folders that likely do not mean much to a user, such as git files or configurations. Hidden filenames usually begin with a “.”, such as `.bashrc` or `.gitconfig`. These can be viewed by adding the `-a` option to the `ls` command by typing `ls -a` into the console.
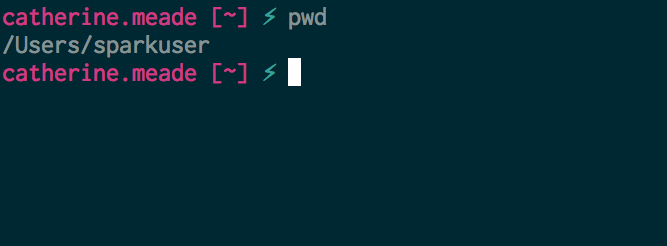
We can have the console print the working directory by typing the command `pwd`.

We want to be in the Desktop, so let’s change to that directory. On the command line, you type `cd` to change directory. You must also specify a directory to change to. The full command will be `cd Desktop`.

Notice how my command prompt changed from [~] to [Desktop] to reflect the present working directory.
Awesome! Time to make that folder. “Folder” is just a different term for a Directory, and we want a new one. It’s funny to note, but every folder/directory, no matter the “location,” is just a pointer on the hard disk. When you move a file (command `mv filename location`), you are just editing this link path—no actual “moving” occurs. Additionally, removing or deleting a file (command `rm filename`), has to unlink the file from everything, and therefore takes comparatively much longer to execute. Some clever Sparkbox developers like to `mv filename ~/.Trash`, rather than `rm`, to save fractions of seconds in their workflow.
Type the make directory command: `mkdir`. This command also needs an additional input, like `cd`, though this time it wants a name for your new directory. Type `mkdir morpheus` into the command line, and press the return key to execute.

The new command prompt lets you know that the command executed; however, we can use the command `ls` just to make sure the new directory is there.

There we go! You can also navigate to your desktop (the GUI one that hides behind your windows), where you should see the new folder created neatly in your graphical interface.
Was that so scary? I didn’t think so. There are all kinds of other command resources out there, but let’s chart out some basic commands here, just for fun.
Basic Commands
cat“concatenate”; creates, reads, or joins files
cd“change directory”; defaults to ~ or takes a location as input
clearscrolls the window to a clear screen
ls“list”; lists the files in the current directory
ls -a“list all”; lists all files in the current directory, even hidden ones
man“manual”; takes a topic as input, and displays the manual for the topic. Pass command names to this command to learn how to use them. e.g. “man ls”
mkdir“make directory”; takes a directory name as input, creates this directory
mv“mv”; takes a filename and a move location, then moves the file to that location. Can also be used to rename a file, by taking the old filename and new filename as input.
pbcopytakes a filename as input, adds the contents of the file to the clipboard - OSX Only
pbpastetakes a filename as input, pastes the clipboard contents to the file - OSX Only
pwd“print working directory”; tells you which directory you are currently in
rm“remove”; deletes stuff
rmdir“remove directory”; deletes an *empty* directory
sayturn on your volume, feed it a string, and try it out - OSX Only
tailtakes a filename as input, prints the final ten lines to the console
touchtakes a filename and extension as input, creates an empty file with that name
Step Four: Git Init
As developers, project managers, and even designers, Git and GitHub are invaluable resources. The trick is, everything in Git is so much simpler when you use the command line. To create a git repository in a directory, all you need to type is `git init`.

Congratulations! You are ready to start learning how to use Git! All kinds of amazing resources are available to you moving forward. One of my personal favorite tools for learning command line and Git / GitHub has been the course available at CodeSchool. Sparkboxer Nathan suggests PluralSight as well. Personally, I just had to get over that initial period of intimidation and try something.
All right, Neo. Follow the White Rabbit. See you on the other side.

