
SaaSha guides you through creating a simple looping loading animation in Figma using Frames and Smart Animate.
Figma animations are a great tool to clearly communicate design intent behind motion in UI. When developers know exactly how an animation should look and feel, it reduces mistakes during implementation and can cut down on some review time. Let’s walk through how you can create a small loading animation in Figma.
Some Figma keywords we’ll cover in this tutorial are:
Frame
Layer
Smart Animate
Prototype
Trigger
Curve
Linear
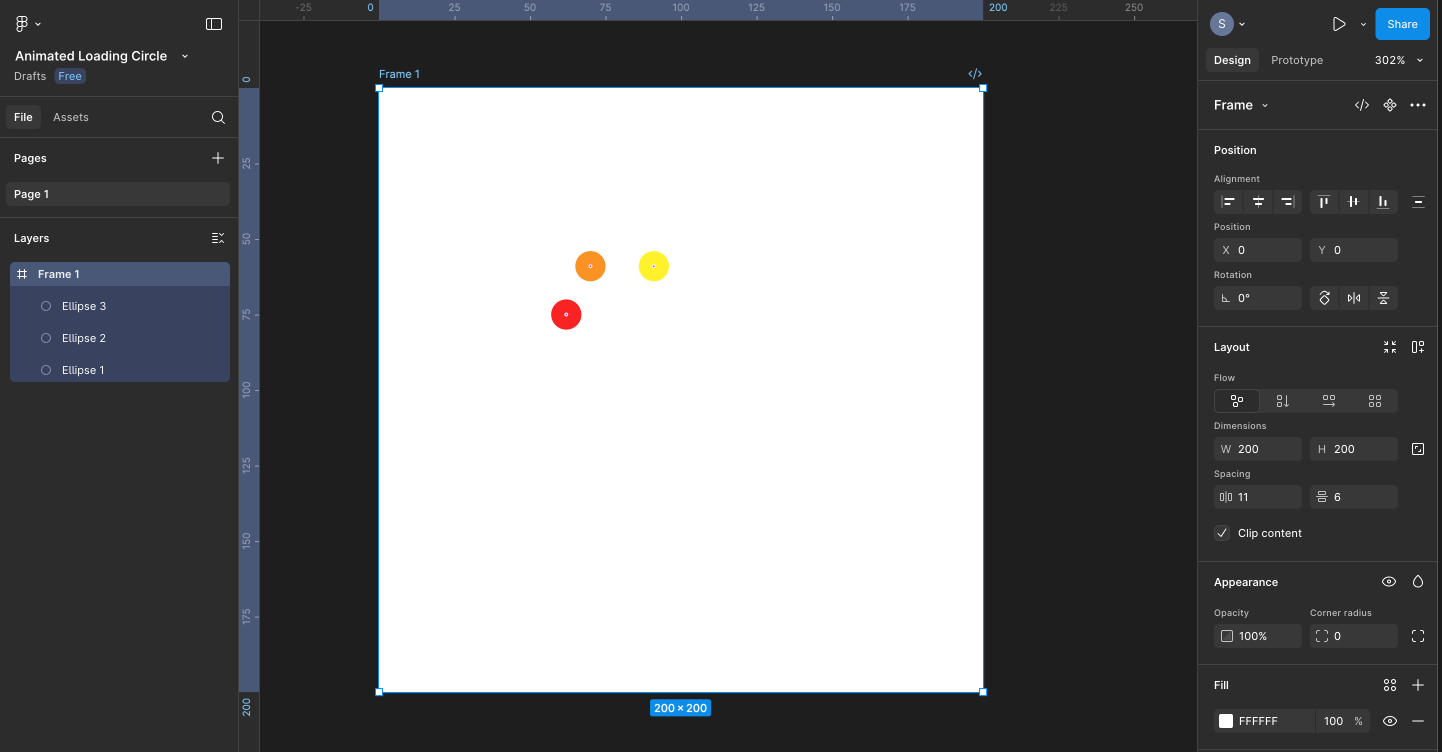
Step 1: Set up the Initial Frame
First, let’s create an initial frame for our animation which will act as the static foundation of our design.
Create a new frame. In this example, we’ll use a 200×200 frame.
Create six 10×10 ellipses, in different colors, and place them in a circle on the frame.
Group them and name the group Dots.
Make sure the group is centered in the frame.
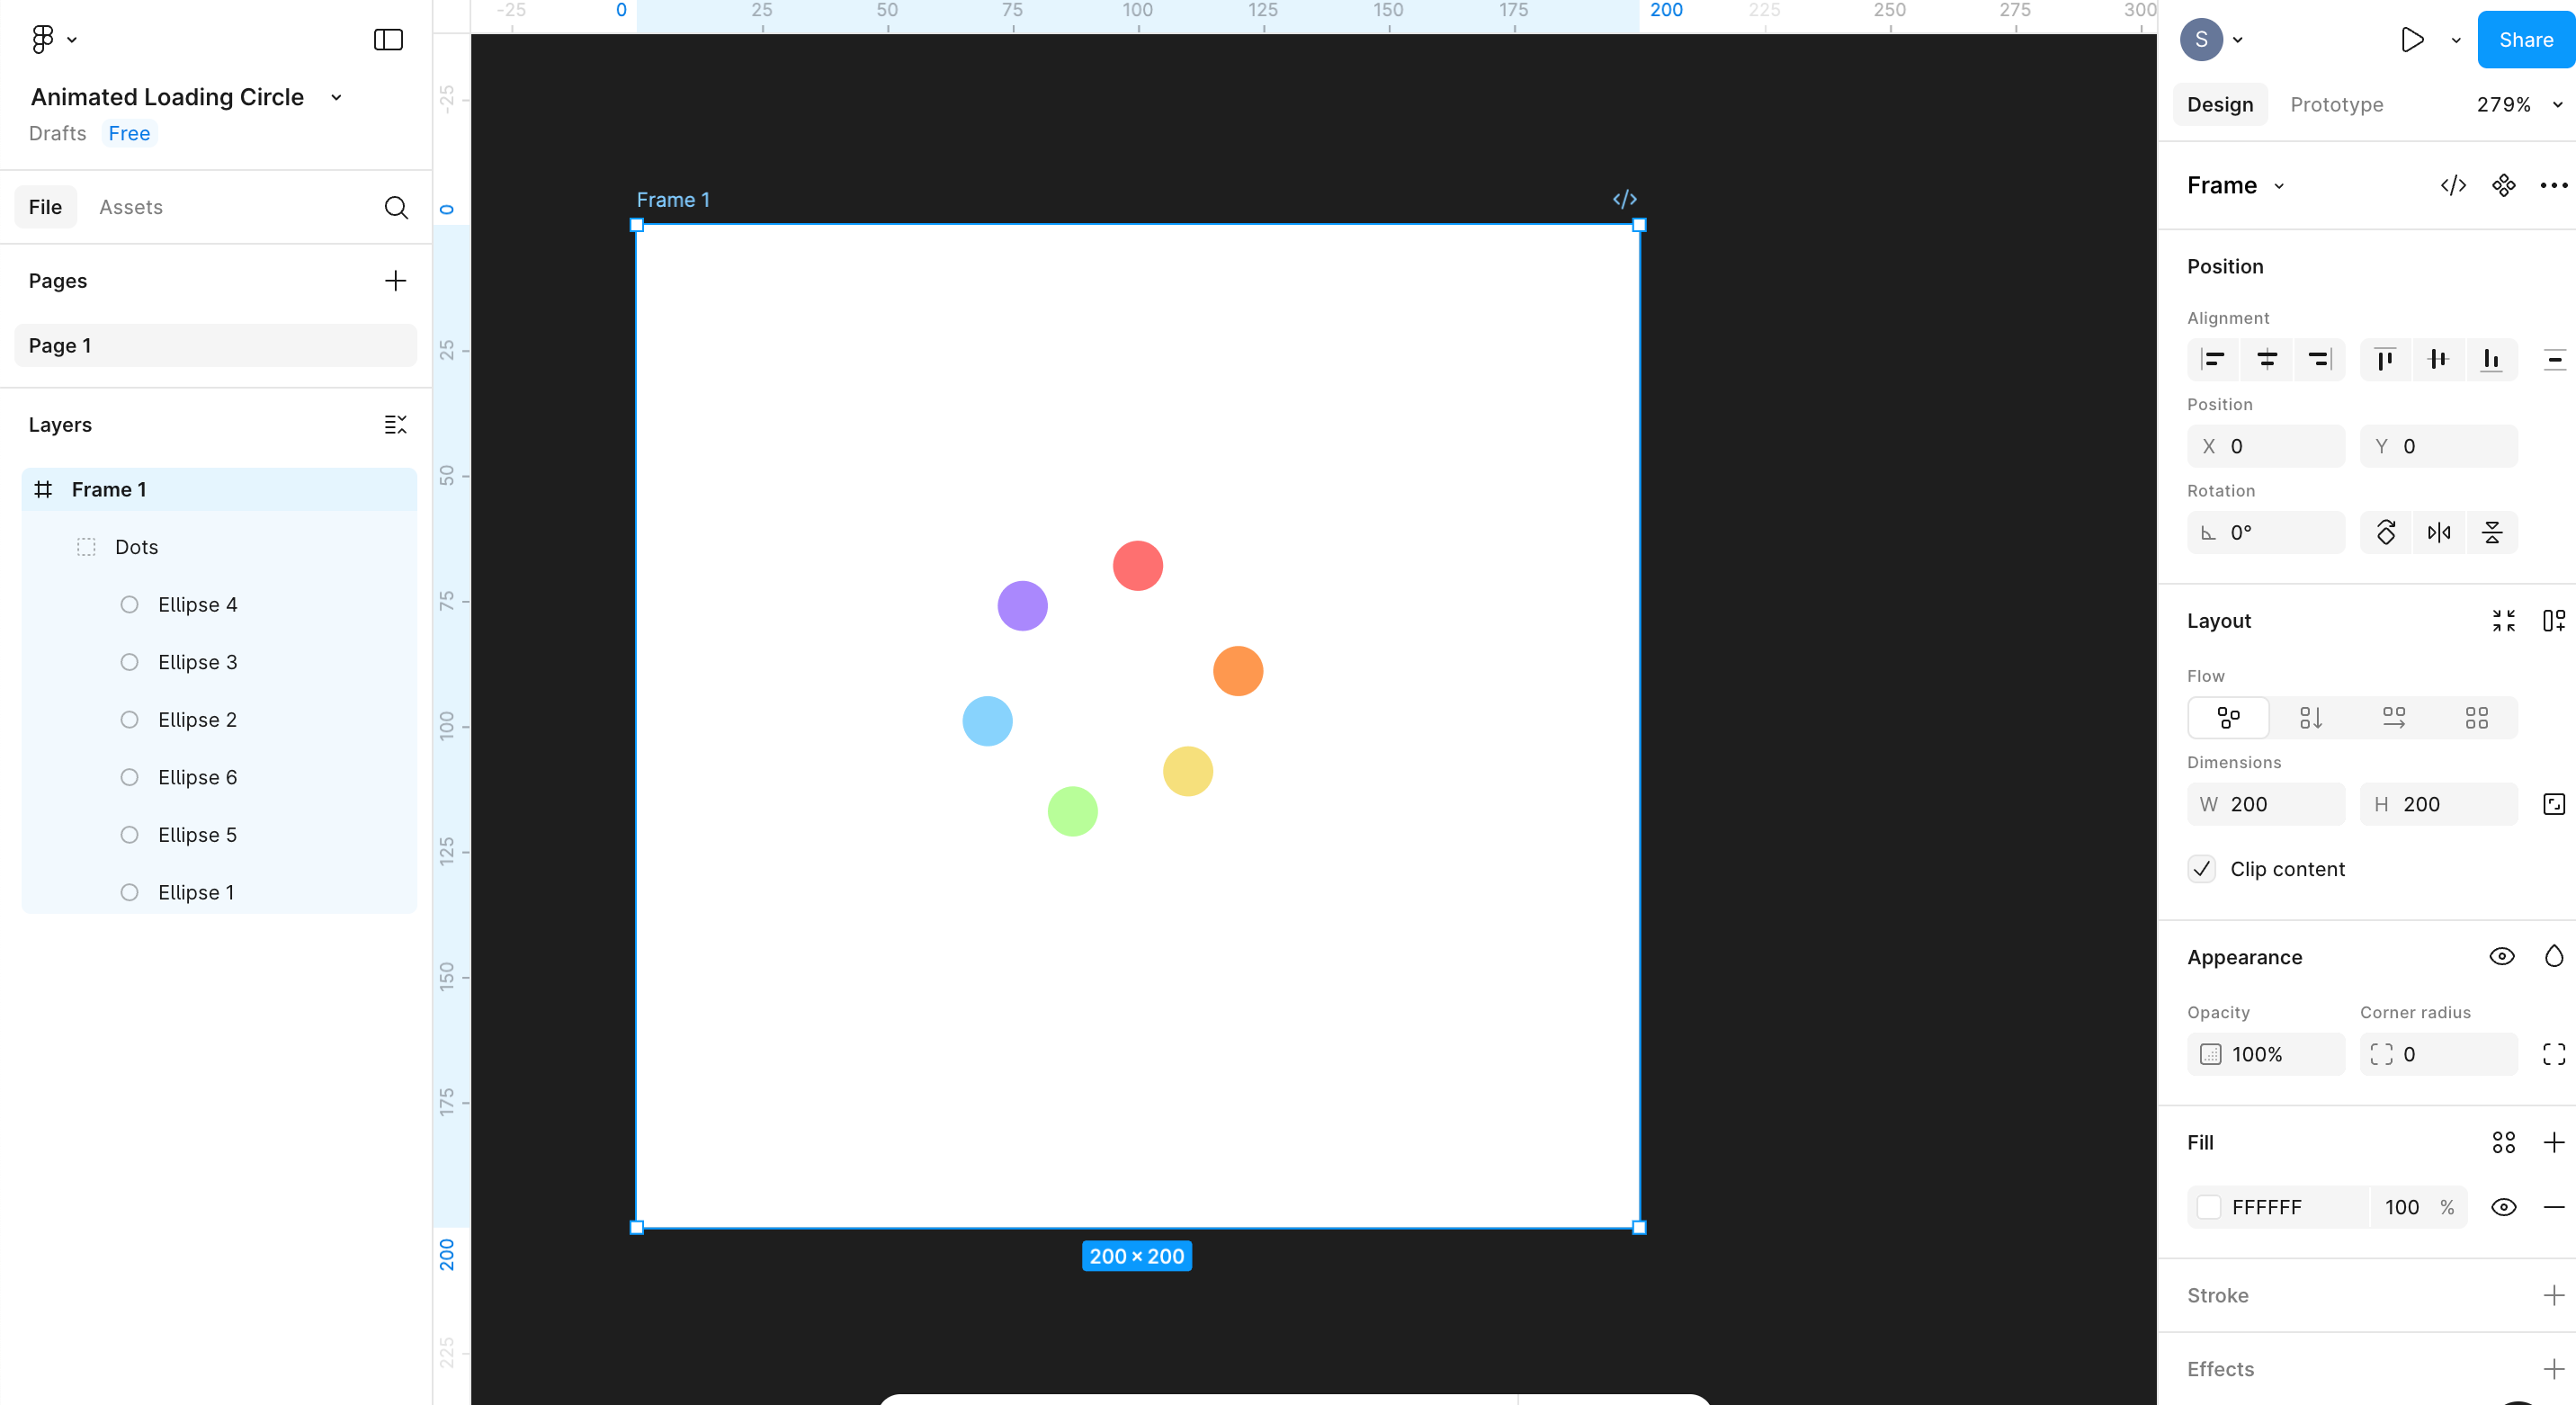
Step 2: Create Animation Frames
Next, you’ll create the animation frames and rotate the dots in each frame so they appear to rotate.
Duplicate the frame 4-6 times. You can duplicate a frame using ⌘ + D on a mac or Ctrl + D on Windows. Figma will automatically paste the frame to the right of the frame that was copied.
On each duplicate frame, select the Dots group and rotate it slightly clockwise. We’ll rotate 30° per frame in this example.
Keep the group centered and the same layer names across frames for Smart Animate to work correctly.
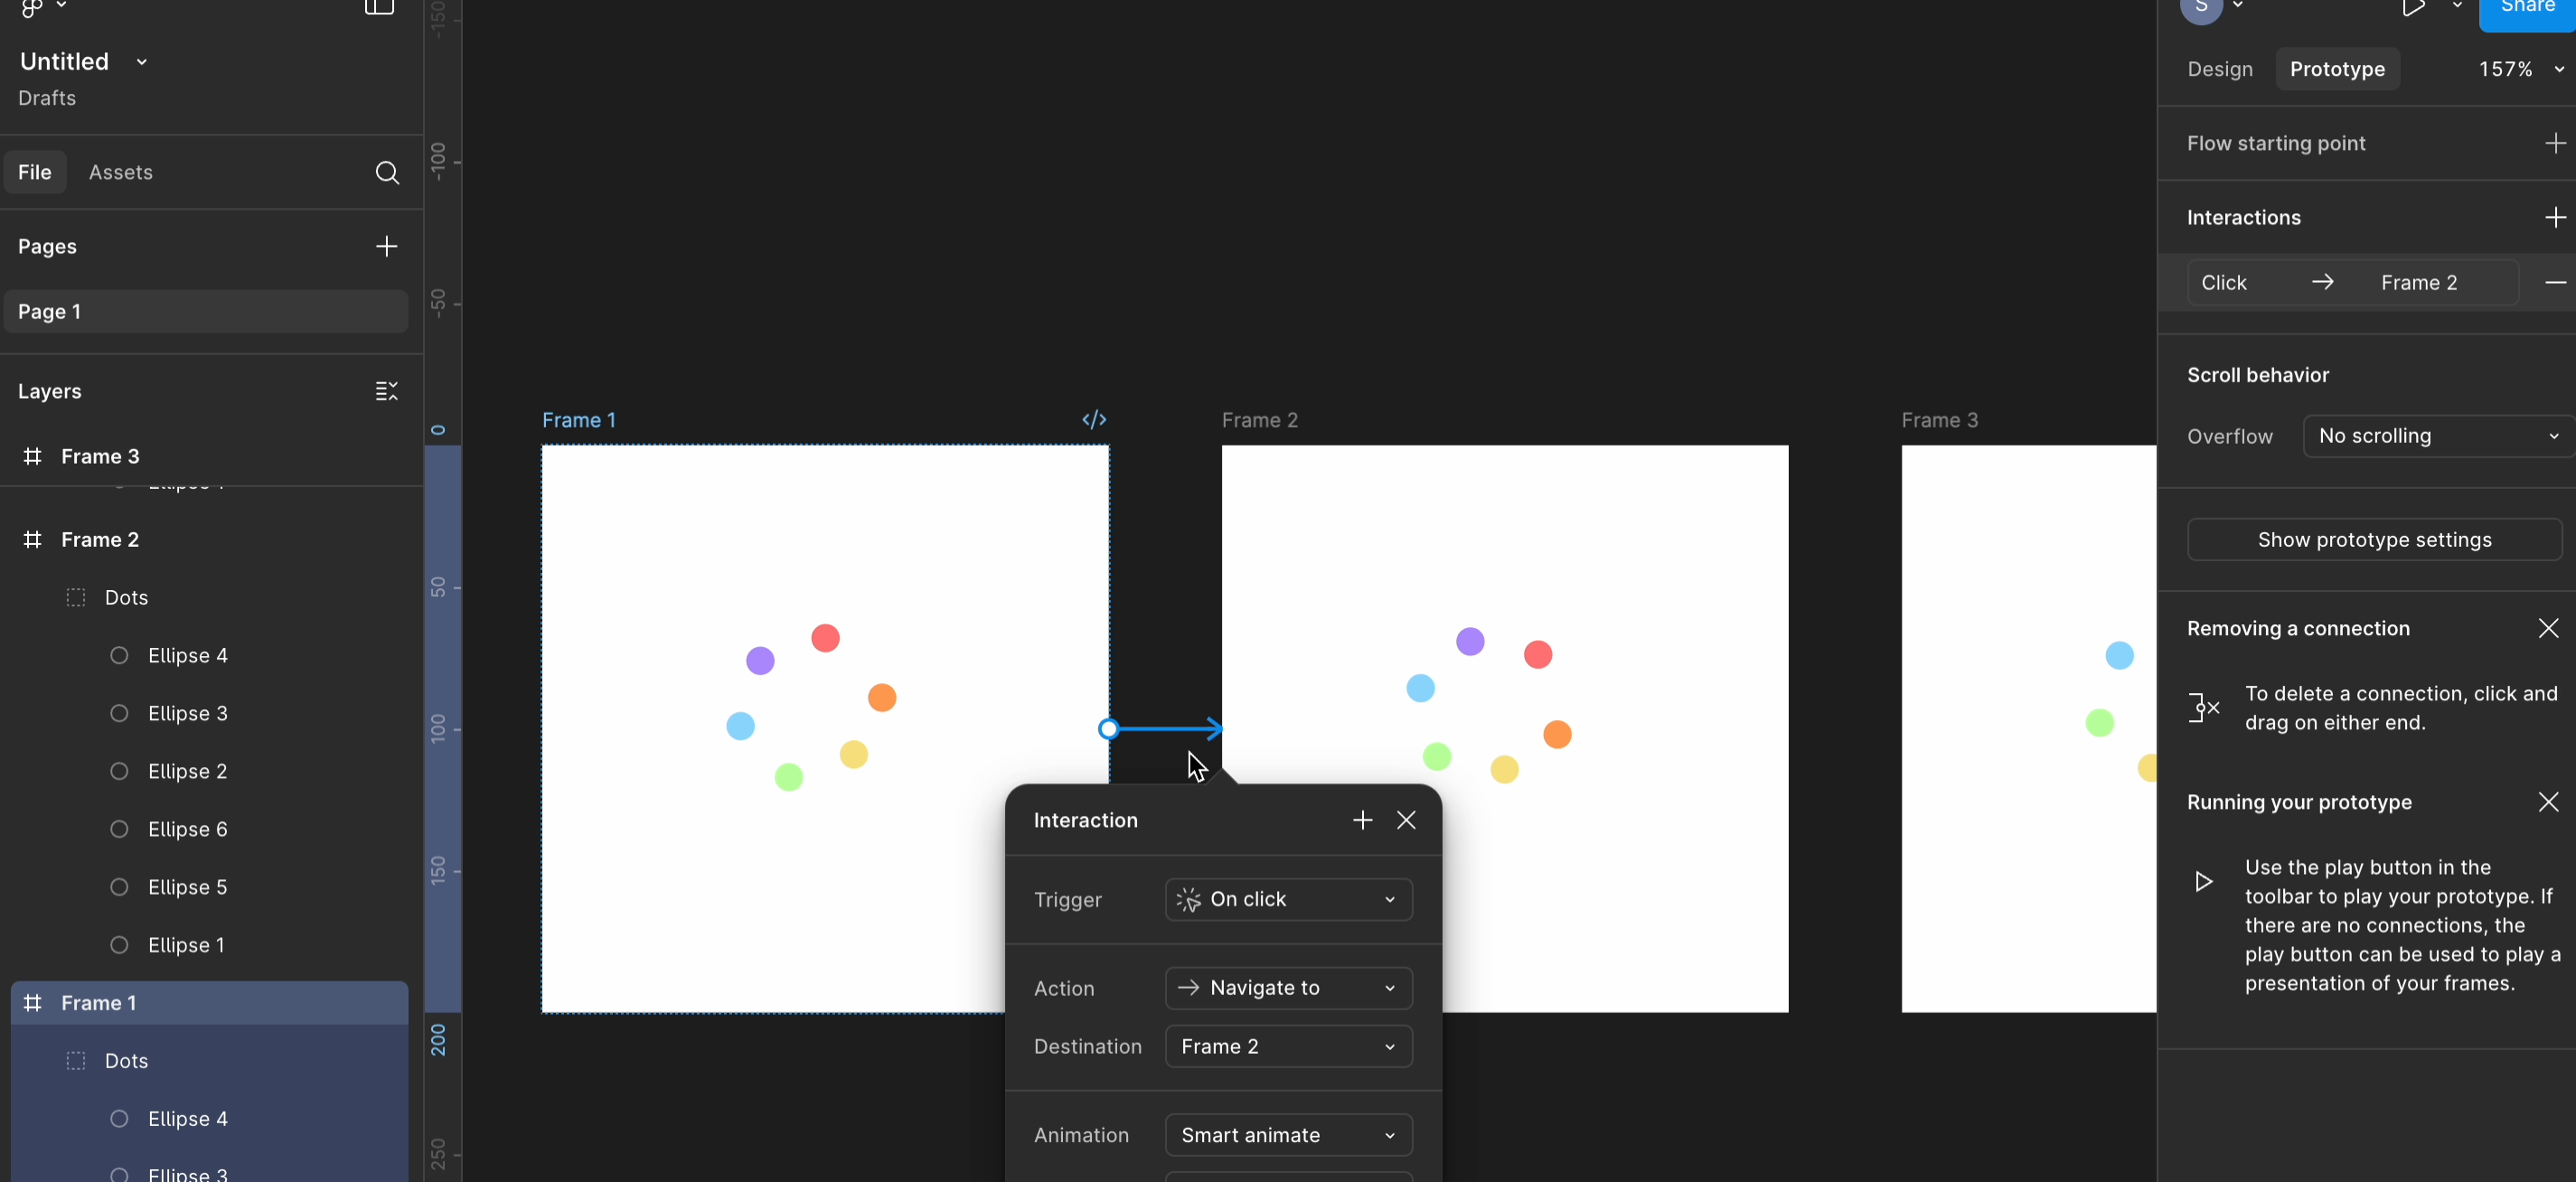
Step 3: Connect the Frames in Prototype Mode
After setting up your frames, the next step is linking them all together in Prototype mode and configuring the animations speed and pace. Smart Animate is an animation option that automatically creates smooth transitions between two frames by matching layers that have the same name and properties
Switch to the Prototype tab.
Connect Frame 1 to Frame 2, using the connection circles on the side of the frame, with the following properties:
Trigger: After Delay (100 ms)
Action: Navigate to
Destination: [Next Frame]
Animation: Smart Animate
Curve: Linear (the Curve property defines how the speed of the animation changes over time. Linear keeps the animation moving at the same pace from start to finish. This is a good option for the consistent speed of the loading circle we’re creating.)
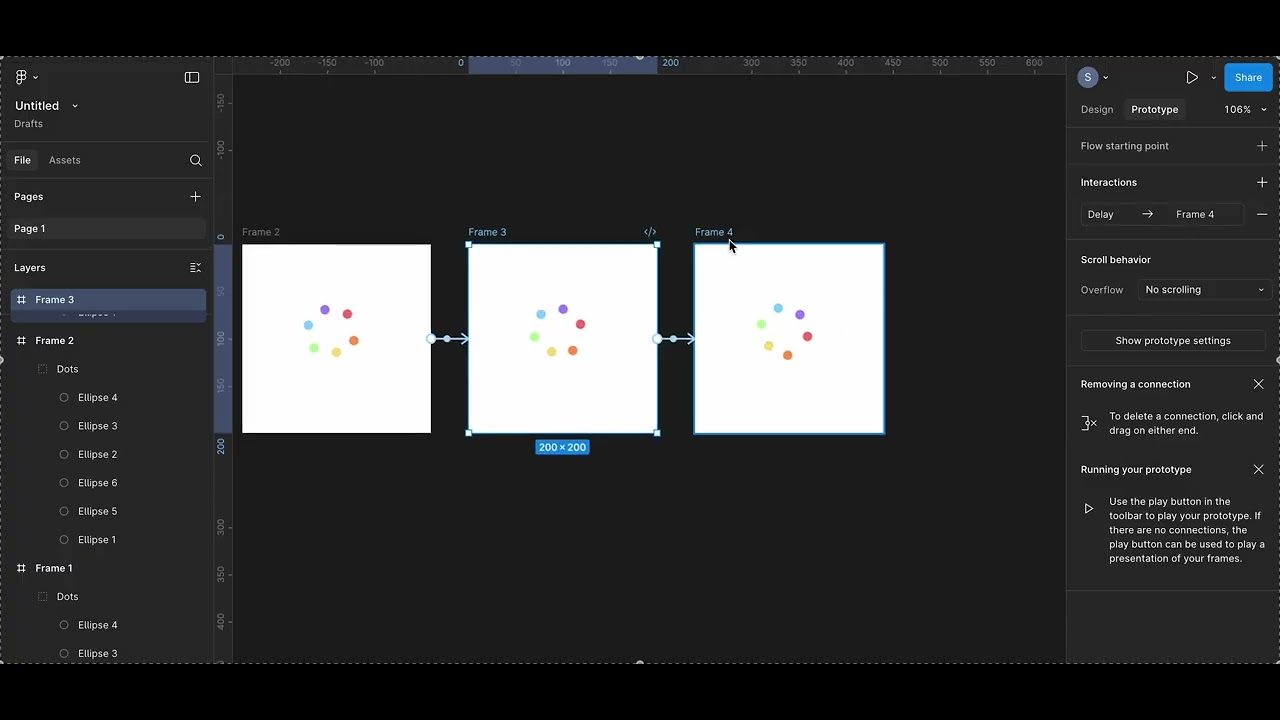
Repeat for Frame 2 → 3, 3 → 4, etc.
Finally, connect the last frame back to Frame
1 to create an animation loop.
Step 4: Preview your loading animation
Click Present next to the Share button to view the entire loading spinner animation.

You can trial with different amounts of frames, speeds, and refine until your animation feels natural. Take a look at the full video below for a complete walkthrough.
With this understanding of how to use the fundamental animation tools in Figma, you can try experimenting with other ideas to bring animation to your Figma mockups. For additional ideas consider animated hover states, loading progress bars, or even moving illustrations. Animations like these help clarify your design intent to developers. Use this tutorial as a starting point, then see how far you can go with Figma’s animation tools.
YouTube embeds track user data for advertising purposes. You can watch the video on YouTube if you prefer not to grant consent for YouTube embeds.


